How to Lay Kit Kat Tiles
With their sleek lines and contemporary design, kit kat tiles are an excellent choice for anyone looking to create a visually stunning impact in a modern home. But how do you lay kit kat tiles yourself to save money without risking spoiling the finish?
Below, you’ll find all of the information you need on how to lay kit kat tiles, along with a list of all the tools and materials needed to do the job properly!
What Tools & Materials Do I Need to Lay Kit Kat Tiles?
As with any DIY task, preparation is key when it comes to laying kit kat tiles. So, let’s kick things off by looking at the tools and materials you’ll need to gather before you start.
Tools You'll Need:
- Tile Trowel
- Tile Cutter/Wet Saw
- Grout Float
- Spirit Level
- Rubber Mallet
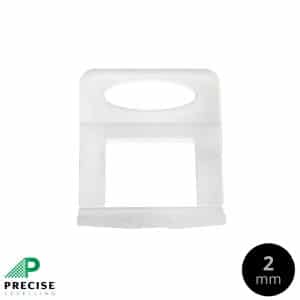
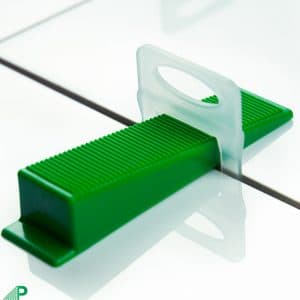
- Tile Spacers
- Sponge
- Bucket
- Gloves
- Safety Glasses
Materials You'll Need:
- Kit Kat Tiles
- Tile Adhesive
- Grout
- Tile Sealer
- Primer
Step-by-Step Guide on How to Lay Kit Kat Tiles

Once you have everything sorted and close to hand, it’s time to start laying your kit kat tiles. Below, you’ll find a step-by-step guide to take you through the entire process, but we highly recommend reading each step before you start so you know what to expect.
Step 1: Prepare the Surface
The first thing you need to do is prepare the surface you’re going to be laying your tiles on. Clean everything down with a brush, then wipe with a damp sponge and allow it to dry completely. You can also use this opportunity to repair any cracks in the surface, as this will add strength to the base.
Step 2: Apply the Primer
Now your surface is prepared, you apply your primer. It can be tempting to skip this step, but applying a primer will ensure that the underlying surface remains waterproof as that will stop the tiles and grout from getting damaged. It will also help the adhesive and ensure the tiles stick once you start laying.
Step 3: Measure and Dry Lay
Once the primer has set, start measuring the area and dry-laying your tiles. Doing this will give you an exact idea of how many tiles you need to use, where you want to place them, and offer the opportunity to cut those that don’t quite fit into shape using your wet saw.
Step 4: Mix the Adhesive and Apply
You’re now ready to start mixing the adhesive. Make sure you follow the manufacturer’s instructions, as this varies between brands. Once it’s ready, grab your tile trowel and spread just enough for 4-6 tiles across your starting point.
Step 5: Apply the Tiles
Acting fairly quickly, press each tile into the applied adhesive using a firm but gentle pressure. Once you’re satisfied with the positioning, insert a tile spacer on each edge and gently tap the tile with your rubber mallet.
You can now lay the rest of the tiles, repeating the same process as above. Also, as you keep laying, remember to check that everything is even using your spirit level and, if not, use your rubber mallet to make the necessary adjustments.
Step 6: Allow the Adhesive to Cure
While this part is a bit boring, it’s incredibly important to let the adhesive cure and dry completely before moving on to the next step. Doing this will ensure that everything is set in place and stops any tiles from slipping when you apply the grout.
Step 7: Apply the Grout
Now the adhesive has fully cured, you can mix and apply the grout to your tiles. Start by removing all of the tile spacers, and then spread some grout onto your rubber float. Working in small sections, press the grout firmly into the gaps using a diagonal motion, ensuring you cover all the spaces as you go.
Step 8: Clean and Seal
Once the grouting has dried, take a damp cloth and wash the tiles down to remove any leftover grout haze. Dry the tiles, and then apply a tile sealer to protect both the tiles and the grout lines from stains and moisture.
Are There Any Safety Considerations I Need to Know Before Laying Kit Kat Tiles?
It doesn’t matter if you’re laying tiles or hanging shelves; every DIY job comes with safety considerations that need to be taken into account to ensure you’re as safe as possible.
You’ll notice both gloves and safety goggles in the list of tools we provided above, and the reason you need this is to stop any sharp edges from cutting your hands or shards from flying into your eyes when you’re cutting tiles.
Likewise, gloves and goggles will help keep your hands and eyes protected from the tile primer, grout, and sealant. You should also consider wearing a safety mask when applying these, and many are made from chemicals that can irritate your lungs when breathed in.
Make sure, also, that any power tools you’re using are kept away from water sources and that the area in general is dry, as this will prevent any slip hazards from occurring. We also highly recommend checking that the surface you’re working on is structurally sound before you start laying your kit kat tiles.
FAQs
Can I install kit kat tiles over existing tiles?
Yes, it is possible to lay kit kat tiles over existing tiles. However, you must ensure that the surface is sturdy, clean, flat, and properly prepared before you start laying your tiles.
How long does it take for tile adhesive and grout to cure?
It typically takes between 24-48 hours for tile adhesive to fully cure, although this can vary dramatically depending on the brand. Make sure you don’t start on the next step of your tile laying project until the recommended curing time has passed, as this can risk ruining your progress.
How do I clean kit kat tiles?
Kit kat tiles are super easy to clean, and a regular wipe with a damp sponge and some tile cleaning spray or a mix of water and mild detergent is enough for regular maintenance.