How to Lay Carpet Tiles?
So you’ve decided to freshen up your space with carpet tiles? Great choice!
Carpet tiles are not only stylish and versatile, they’re also a breeze to install. With these tiles, you can bring cosiness to any space with its innate warmness and softness. Plus, they’re durable and easy to replace should an area wear out or get stained.
Ready to roll up those sleeves and get started? Join Cheap Tiles Online as we break down the process, making your carpet tile transformation as simple as possible.
What Tools and Materials Do I Need to Lay Carpet Tiles?
Before you start, make sure you have the right tools and materials ready. These include:
- Carpet roller
- Carpet tiles
- Chalk line
- Hammer
- Mastic (if the carpet tiles don’t have double-sided carpet tape)
- Pry bar
- Straight edge
- Tape measure
- Utility knife
- V-notch trowel (for mastic application)
Step-by-Step Guide on How to Lay Carpet Tiles
Now that we have our tools and materials set up, let’s dive straight into the heart of the process. Follow these steps meticulously, and before you know it, you’ll be admiring your newly carpeted room.
Step 1: Material calculation
Kick things off by making sure we’ve got enough tiles and adhesive on hand. Start by doing a quick measure of your room – just multiply the length by the width to find out how many square meters you’re working with. Next, divide this number by the size of your carpet tile.
Remember to add a little extra – say 10-15%, just to cover any slip-ups or future replacements. If your room is about 36 square meters and you’ve chosen 60 cm by 60 cm tiles, you’ll need around 40 tiles.
Step 2: Area preparation
Now that we’ve got our materials in order, let’s get the room ready. Order your tiles and let them get comfortable with the room’s temperature. Use a pry bar to carefully remove any baseboards in your room. If you have none, you can skip this step.
Pro tip: Mix up tiles from different boxes to balance out any colour variations. Also, keep the arrows on the tile bottoms pointing the same way. If you’re getting creative with colours or patterns, arrange them at a 90-degree angle.
Step 3: Find your room centre
This is a crucial step. By finding and marking the centre of the room, you ensure a smooth and even installation when you get to the walls. Locate the middle of each wall and make a mark there. Then, draw chalk lines on the floor between these marks – they should cross right in the middle of the room.
Starting from this point, arrange your carpet squares along the lines without any adhesive just yet. Keep placing whole tiles until you’re close to the wall. If the remaining gap is more than half a tile wide, shift the row to accommodate another whole tile.
Step 4: Layout trial
Begin at the centre and work your way out, aligning your carpet tiles with the baseline. If you find that the space near the wall is less than half the width of a tile, it’s time to adjust your centre point and lines. This way, you can fit at least half a tile comfortably in the remaining space.
Step 5: Tile Installation
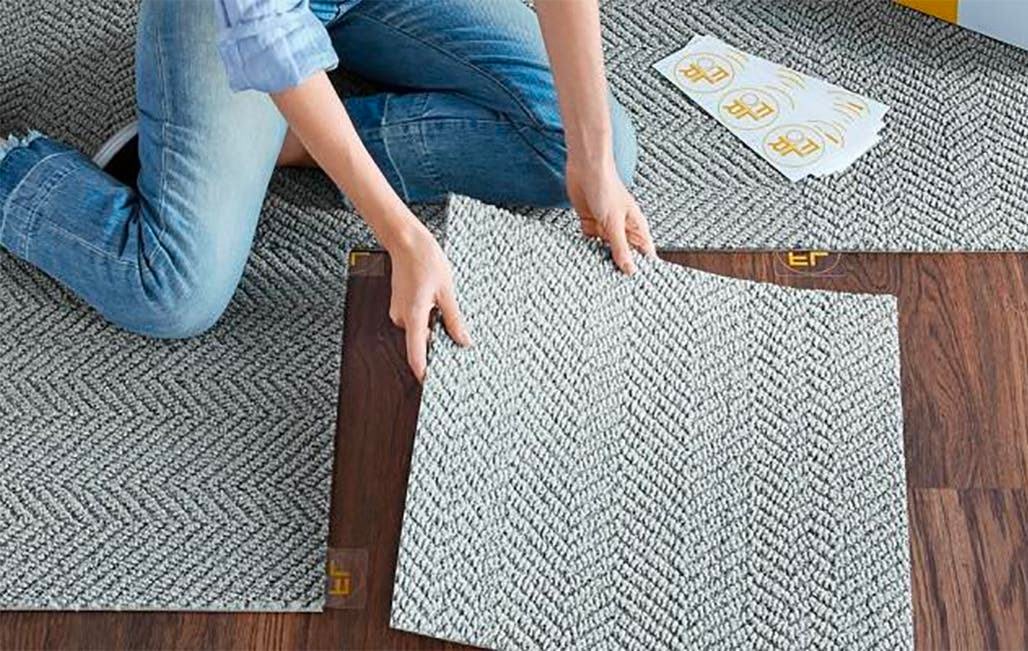
Now comes the fun part – installing your carpet tiles! Each tile has a pile direction marked by an arrow at the back. For a smooth, seamless look, ensure all arrows are pointing in the same direction, or twist them as per your desired pattern.
If you’re using carpet tiles with double-sided tape, just peel off the protective layer to reveal the sticky side. Gently place the tile on the floor and adjust it until it’s perfectly square. Once you’re satisfied with its position, firmly press the tile in place.
For tiles without double-sided tape, use a V-notch trowel to spread adhesive on the floor, enough for two or three tiles at a time. Be sure to follow the manufacturer’s instructions to a tee – some adhesives need to get a bit sticky before you can lay down the tile. Carefully place the tile on the adhesive, avoiding any contact between the adhesive and the carpet surface. Once it’s correctly positioned, press the tile into place.
Safety Tip: Some adhesives can release harmful fumes. Always wear a respirator and keep windows open for better ventilation.
Step 6: Wall-Adjacent Tile Cutting and Installation
Now that you’ve covered most of the floor, it’s time to size up and install the tiles along the walls. Check the space between the wall and your last full tile, then bring this measurement over to a new tile. Using a straight edge and a utility knife, cut it down to size.
Take your time and measure each gap individually – remember, walls can be a little wonky sometimes. Don’t forget to check the pile direction before making your cut. Install these tiles just like you did in the previous step.
Step 7: Final Touches with a Carpet Roller
With all the tiles in place, now’s the time to roll out your carpet roller. This will help secure the tiles firmly to the underfloor. Make sure to roll over each tile several times and in different directions to ensure they’re well stuck. If you had taken off the baseboards earlier, go ahead and put them back in place.
Once everything is set, your carpet tile installation is all done! Depending on the type of adhesive used for your new flooring, you might need to wait for it to dry before you vacuum. Take a quick look at the manufacturer’s instructions to be sure.
Safety Considerations
FAQs
What is the best adhesive for carpet tiles?
The best adhesive for carpet tiles is one that is specifically designed for this purpose. At Cheap Tiles Online, we recommend a pressure-sensitive adhesive, such as Davco Supamastic, for carpet tiles due to its strength and ease of use.
How long does it take to install carpet tiles?
The installation time for carpet tiles can vary, largely dependent upon the size of the room and the preparatory work required. However, as a general guide, a room of about 30 square metres could typically be completed in a day by an individual with a reasonable level of DIY experience.
Can carpet tiles be installed over the existing carpet?
While it is technically possible to install carpet tiles over an existing carpet, it is generally not recommended. The existing carpet can create an unstable base, potentially leading to issues with adhesion and unevenness. It’s generally best to remove the old carpet and prepare the subfloor properly before installing carpet tiles.